BIO 432

Field Botany

Phil

Ganter

320 Harned Hall

963-5782

Eulychnia castanea fruit The plant is a 3 foot tall cactus that grows along the Pacific coast in north central Chile. The insert is the fruit cut open. It did not taste very sweet. A fruit like this would be difficult to preserve. 

How to preserve the specimens we collect

Email me

Back to:

Academic Page  Tennessee State Home page 
Bio 432 Page  Ganter home page 

Why this note?

Once you return from collecting, the real work begins. You have to preserve your specimens before mounting them. If you do not do this carefully, you can end up with rotting vegetation instead of a specimen. Rotting vegetation will not count as one of the 50 specimens needed.

You will need

Newspaper

Some heavy books (phone books and the like)

Blotting Paper (Construction Paper) 11 x 14 inches

This will be the paper you use for mounting, unless it gets damaged in the drying process

Folder or Binder of the appropriate size

An office supply store will have both the paper and the binder. We just need something that will hold the mounted sheets, like a large file holder.

The easiest way to get a binder is to make one.  Get some stiff paper (at least 14" x 24"), some cardboard, some thick twine (shoelaces will work), and some reinforcement rings for the holes.  Use the cardboard to back the paper, punch three holes in both front and back.  The holes should correspond to holes punched in the specimen sheets.  Reinforce all of the holes in sheets and in the front and back binder covers.  When you are ready, assemble the collection by lacing the twine through the holes to bind the covers and specimen sheets together.

Remember that the specimen sheets must be in alphabetical order according to the binomial (the scientific name).


Whole plants - Herbs and Grasses

Allow the plant to wilt some before arranging it on the blotting paper

Arrange the plant as it will appear when mounted.

Display the leaves so that one can see their shapes easily.

Be sure to turn some leave over so that both sides can be easily seen (some leaves have very different tops and bottoms).

Leave room for a label that is at least the size of a note card

Arrange any inflorescences so that all of the flower parts (sepals, petals, etc) can be seen and counted. Many plant keys use the number of plant parts

If the plant is longer than the paper, you have two options. If it is not very much longer, you can bend the stem so that it fits onto the paper. If it is a lot longer, then remove some of the stem with a sharp knife or box cutter. Note how much stem has been removed in your notebook.

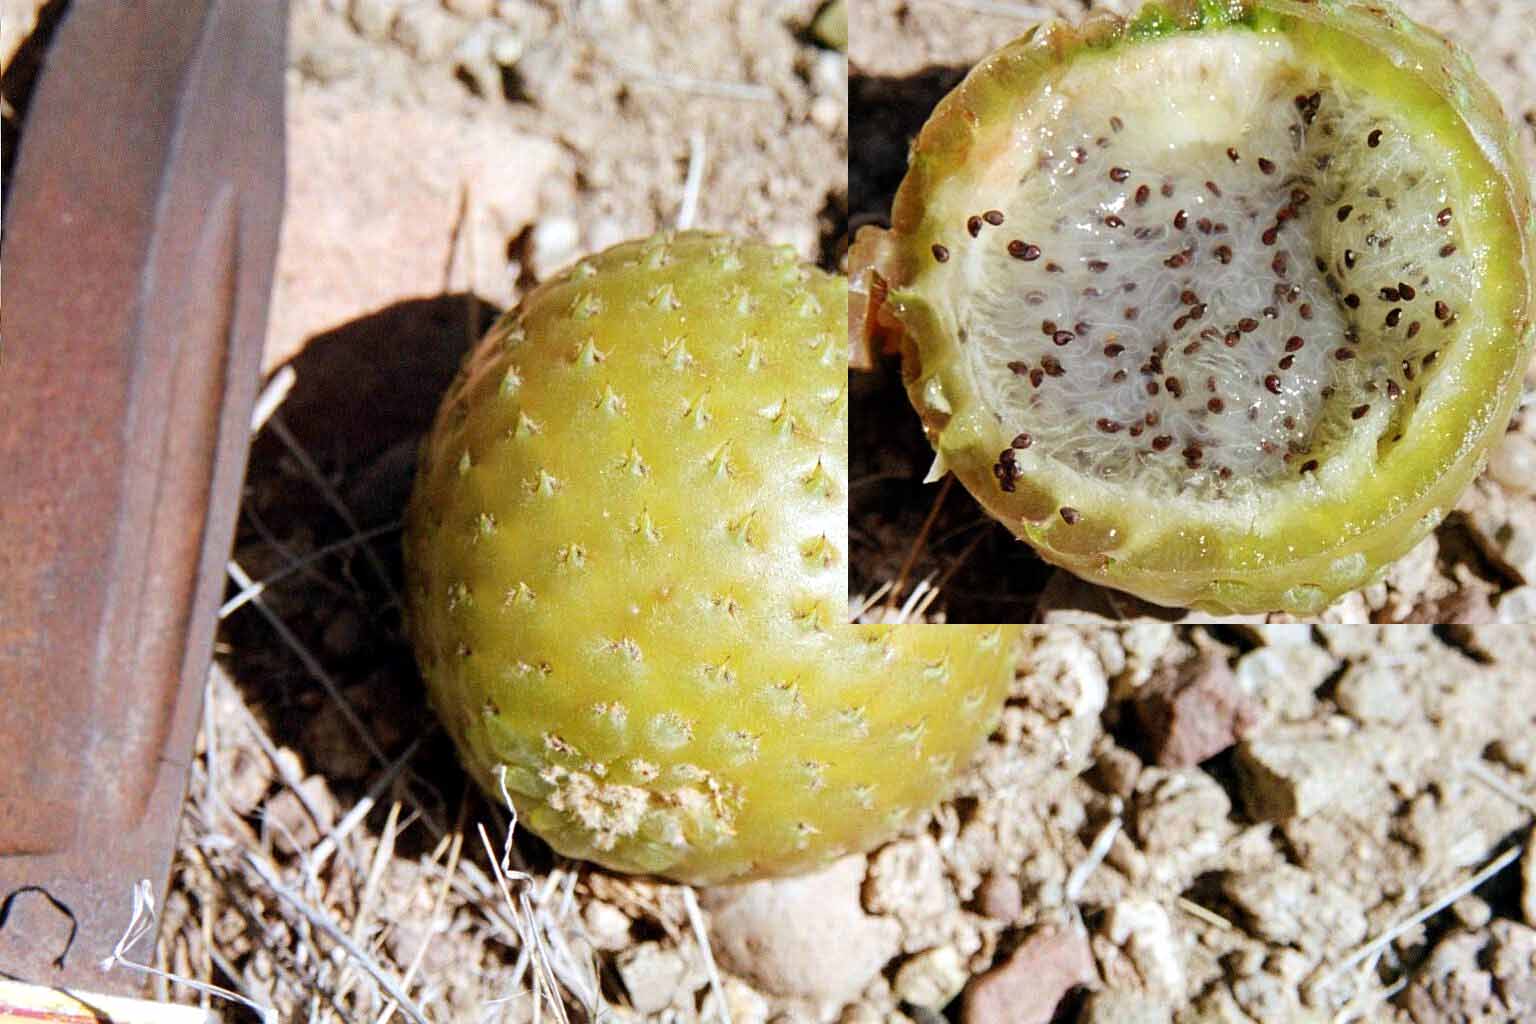
Remove any fleshy fruit. For our purposes, we will not take the measures necessary to preserve this sort of fruit. If you leave it with the plant, it might rot before it dries. If you do remove it, you must describe it well in your notebook. Note its shape (draw it!), measure and record its size, note the color and describe any odor. Open the fruit and note the shape (draw it), size, color and approximate number of the seeds it contains.

If there are dry fruits, open one and place the seeds near it. You might want to hold them aside (perhaps in the plastic bag with the label still in it). The seeds will be mounted too.

Place some newspaper below and on top of the plant and blotter. This is to absorb any moisture pressed from the plant

Place the stack of plants, paper, and newspaper somewhere safe. Things will dry quickest when dry air can get to the stack. Warmth helps also. The faster you dry the specimens, the less chance of rot and the better the color will be. Put some heavy books or other weights on top of the stack (not too heavy).

Trees and shrubs

Only the leaves, flowers, and fruits need be dried. However, the twig and bark can be arranged with the rest. No harm will come if they accompany the leaves, etc.

Follow the procedure as above.

For a look at some well preserved and some not-so well preserved plants, go to the Examples page

Go back to the Collection page

Go forward to the Mounting page

Last updated July 9, 2013